

The elite multinational counter-terrorism unit codenamed Rainbow Six is called into service against a worldwide terrorist threat from an organization known as the Global Liberation Front, a group that is comprised of various leftist, anarchists, and third-world organizations opposed to western civilization. Rainbow Six is tasked with tracking down GLF cells in various countries and either capturing or killing that cells leader.
Rainbow Six Lockdown is the fourth game in the Rainbow Six series and was released in February 2006 for Windows having been developed by Red Storm Entertainment. It is the first game in the series to feature advanced graphics effects and physics objects, and is the first game in the series where the planning phase was removed from the pre-mission setup.
This series of after-action reports is intended to be a higher level summary of the flow of each mission with some commentary offered under most of the screen shots provided. The game is presently available on Steam for $9.99.
Setup Phase

The Mission Setup panel indicates that the action is to take
place in Amsterdam on June 10th in a mostly internal structure.

The Briefing Overview panel provides the backstory for the
mission as provided by the onsite coordinator Alistair Stanley.

The Briefing Intel panel indicates that the first map load
is a tight sequencing of rooms and hallways leading to the prison level access
point.

The second map load is still largely internal however there
are some rather large areas and elevated positions that will have to be
navigated successfully.

The Team Outfitting panel indicates that I will be taking Chavez, Loiselle, Price, and Raymond along on this mission. These are hard coded selections made in the campaign design and I do not have the ability to alter my team members, but can adjust their equipped kits.
I issue the entire team the SA58 with Red Dot scope, a high capacity magazine for the side arm, as well as two sets of flash bang grenades. The Battle Dress Uniform is changed to Black Ops.
Action Phase

The team is inserted into the battle space and we perform a
tactical entry into the first room using a hammer followed by a flash bang.
There are several NPC police officers and tangos having a shootout in this room
and Rainbows entrance saves the cops from slaughter.

A quick sweep of the hallways and rooms clears the second
floor area and completes the objective to secure the armory.

The bodies are already piling up as it looks like it is
going to be another Rainbow vs. The World type scenario.
This long hallway would provide difficult to traverse as
there were elevated shooters across the street that immediately fired upon us
as we crossed the windows.

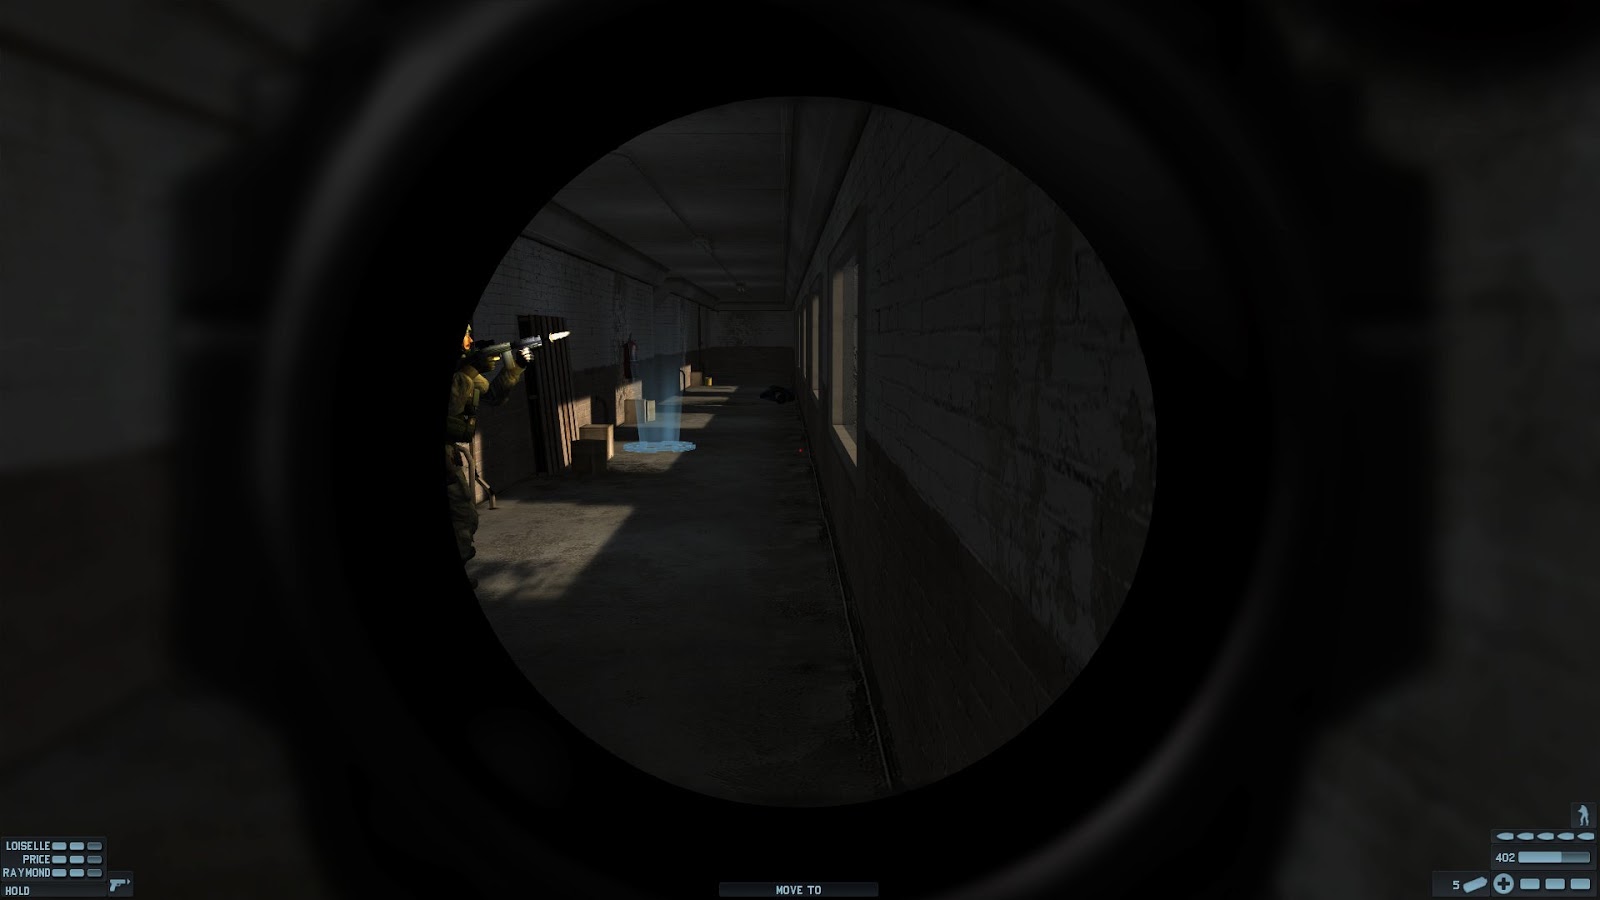
The Motion Sensor (which replaced the Heartbeat Sensor from
previous games) proved invaluable in scouting the multitude of rooms. In this
screenshot my team is to the left going down the hallway while the two offset
images in the center and to the right are tangos located just behind the door
in front of me.

Making it through the maze-like network of hallways and
rooms we come upon this freight elevator which loads the second and final map
area of the mission.

Another action item left out of the briefing material: here we have a keyboard which must be interacted with in order to open up the cell doors that are presently locked just outside of the image to the right.

Moving through the complex the team comes across perhaps the
most treacherous navigation point of the entire map (if not the campaign to
date). The windows to the right look down into a cavernous lunch room/activity
area that has multiple elevation points and areas to hide behind.

Here I attempt to peak and am greeted with an RPG round that
explodes against a wall behind me.

The size and tactical nightmare of the activities area can be partially seen here.

Making our way outside and up, we encounter the first ladder
of the campaign used to navigate to an otherwise restricted area of the map.

This led to a nicely configured and lit administrative section of the complex. While I appreciate the amount of detail that went into this area, I cannot help but feel that it was cheapened by the Ghost Recon poster in the corner.
There were only a handful of recurring posters in the game (so far): Ghost Recon, Got Propane? and I believe only one other which leads me to believe these may have been placeholders for some form of dynamic advertising that could have been planned had the game been successful commercially (which it was not).

This was an unexpected environmental effect in the game: the
goggles frosting over in a walk-in freezer unit.

The hostages were located in some cell blocks just off of
the activities area. Here the apparent lack of an in-mission map did me in as I
wasted a lot of time trying to find them.

This area was one of the nice “attention to detail” aspects
of the map that are easy to overlook when racing through the action.

All in all this map has to be the best rendition of a prison
complex I have witnessed in any Raven Shield game, or any video game for that
matter. It is a shame the game was an abysmal failure as there was some serious
effort that went into mapping the various locations for the campaign.

The team makes it back outside with the hostages to reach
the extraction point as the Blackhawk helicopter swoops in.
After-action Report

85 tangos down. That makes 350 give or take so far through
four out of the 16 mission campaign set so I am on pace to kill approximately
1,400 tangos if this keeps up.
Post Mortem
Although this game is not as tactical as the earlier installments (such as Rogue Spear or even Raven Shield for that matter), I am having fun with it nonetheless and plan on finishing this campaign play through before hanging it up and moving on to another shooter.
Ideally I would like to do a campaign survey theme for each game (not a full blown walkthrough trainer), however that is a bit complicated as there are issues running the older games in the Windows 7 environment even with the various compatibility troubleshooting steps available.
I recognize this post is old but for others who end up here, two important notes: FIRST: the Hostages must be with you to activate the last escape zone. SECOND: Using the motion sensor (B on the PC) the hostages will show up in a mini map with a box around them.
ReplyDelete