This rules out snipers taking valid shots that on any other setting other than Elite Mode would be a legitimate kill in any mission without points being deducted for unauthorized use of deadly force. This also rules out any weapon that may harm a civilian, such as a stinger grenade.
Even if you take all suspects into custody, secure all bombs within the time limit, secure all evidence and report all statuses to TOC, you will fail the mission on Elite Mode if you are injured, have any officer down or more than one injured, or have any suspect or hostage incapacitated or neutralized. This is a departure from the normal scoring of the base game.
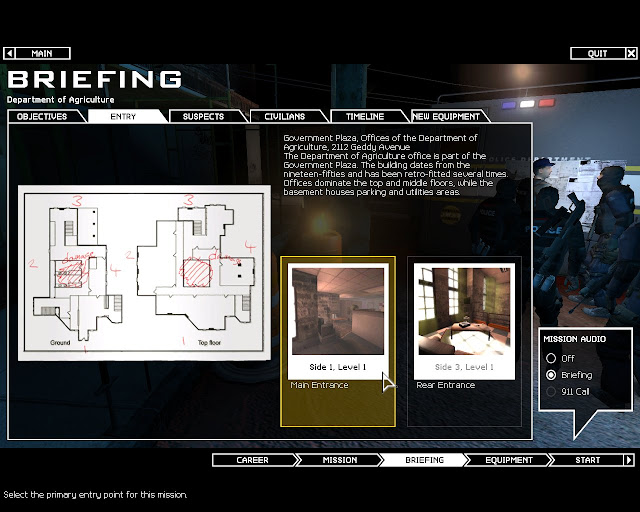
In the first mission of The Stetchkov Syndicate expansion pack, “Funtime Amusements”, I had one officer down but scored a 97 and passed the mission with the ranking of Inspector. All missions since, including Department of Agriculture, I had no officers go down but could only attain a score of 95 points which is an Inspector rating as well.
This presents the player with the following blunt facts – if you hope to pass these missions on Elite Mode and advance within an Officer Career, if you are injured, have an officer, civilian or suspect go down, or have more than one officer injured on any suspect or civilian incapacitated, you might as well abort the mission and start over.
No matter what you do from that point forward you will not advance in Elite Mode, even if the mission is marked as “Completed” (which will be in red lettering signifying failure). As we all know from the famous X-Files episode “Darkness Falls”, failure is not an option. At least not when playing SWAT 4 on Elite Mode, so here I will actually try to provide a semi-walkthrough.
All team members should be equipped with the following kit: Less Lethal Shotgun (beanbags), Cobra Stun Gun, 2 Flash-bangs, 1 Stinger, 1 Ammo Pouch and 1 Optiwand. Breaching will be via C2 charges if needed, and forget about the night vision goggles (the AI never use them yet they still have flashlights on their shotguns, whereas you only have NV).
The best plan of attack is to leave your AI Element in place at the initial spawn point as you cannot afford more than one to be injured or any of them to go down (mission failure). You will have to Rambo it through the map and secure most of the bombs on your own. I only brought the AI Element online when I went to the top floor where I used them with stacked orders so we could all enter the same room through three different doors.
The only other point they are useful (other than mirroring under doors while you are taking care of all the heavy lifting) is when making first entry to the flooded parking area (I sent them down with a move to command while immediately throwing a Flash-bang down in front of them). Most times they are successful in securing the suspects that are lying in wait.
Many of the walkthroughs online are woefully inadequate regarding this mission, stating things such as “no time for mirroring” and “charge into the room”. You can tell the authors have never completed this mission on Elite Mode as their kit selection includes lethal weapons (again, killing even one suspect or having them accidentally killed by another suspect will fail an Elite Mode mission).
The Pepper-ball gun with the OC balls is completely useless on this map given the long hallways and aggressive settings of some of the suspects. The one or two suspects you may get with the gas mask are almost completely immune to OC, so you would be wasting your time with that weapon. The best course of action is to bang a hallway (which will stun a suspect on the other end), then rush them while blasting away with the LL shotgun.
I realize this is unrealistic, but it is the only thing that consistently works in this mission. While the Element AI is generally very competent in the game, this mission sorely shows off their weaknesses. The main issues are that the last AI unit of the Element will almost always get stuck on the railing at the base of the stairs when they are going up, requiring you to go down and bump them off.
If you round a corner and then order the Element to “Fall In”, they will take the shortest path to you, which usually is through a room causing their untimely demise. Even while equipped with Cobra Stun Guns, the AI will never employ them against anyone unless explicitly ordered to by you.
If you are taking the AI with you while racing through the map to secure all of the bombs, make sure to punch unruly civilians so they will go into a non-aggressive stance (don’t waste time zip-cuffing them until all bombs are secured). If you do not subdue the unruly civilian, the Element AI will not follow additional orders while they stand shouting at the civilian to get down.
I am glad I am done with this mission and I have no desire to attempt a replay to obtain a perfect score.
Other thoughts: I played this mission with a different screen resolution (not widescreen) as I had issues with the tabs text in the menu screen not showing when in WS mode. Also in WS mode, the bomb timer is not visible.


This campaign was abandoned due to the files being lost during a system upgrade: I intend to re-launch this campaign in the future with short consolidated posts to cover those missions already blogged about, and to pick up where I left off with full blog installments.
ReplyDelete