

Game Options


Pregame Setup Phase One

I am playing the scenario in full 30 minute (simulated) turns. There are a total of 16 turns however this mission will be done long before that.
Realism Options

NATO units are intended to use stealthy movement by default which enables them to utilize any available local cover and concealment to optimal advantage while moving. WARSAW Pact forces typically put a premium on high speed movement and overall formation cohesion so they would generally not utilize stealthy movement.
Pregame Setup Phase One

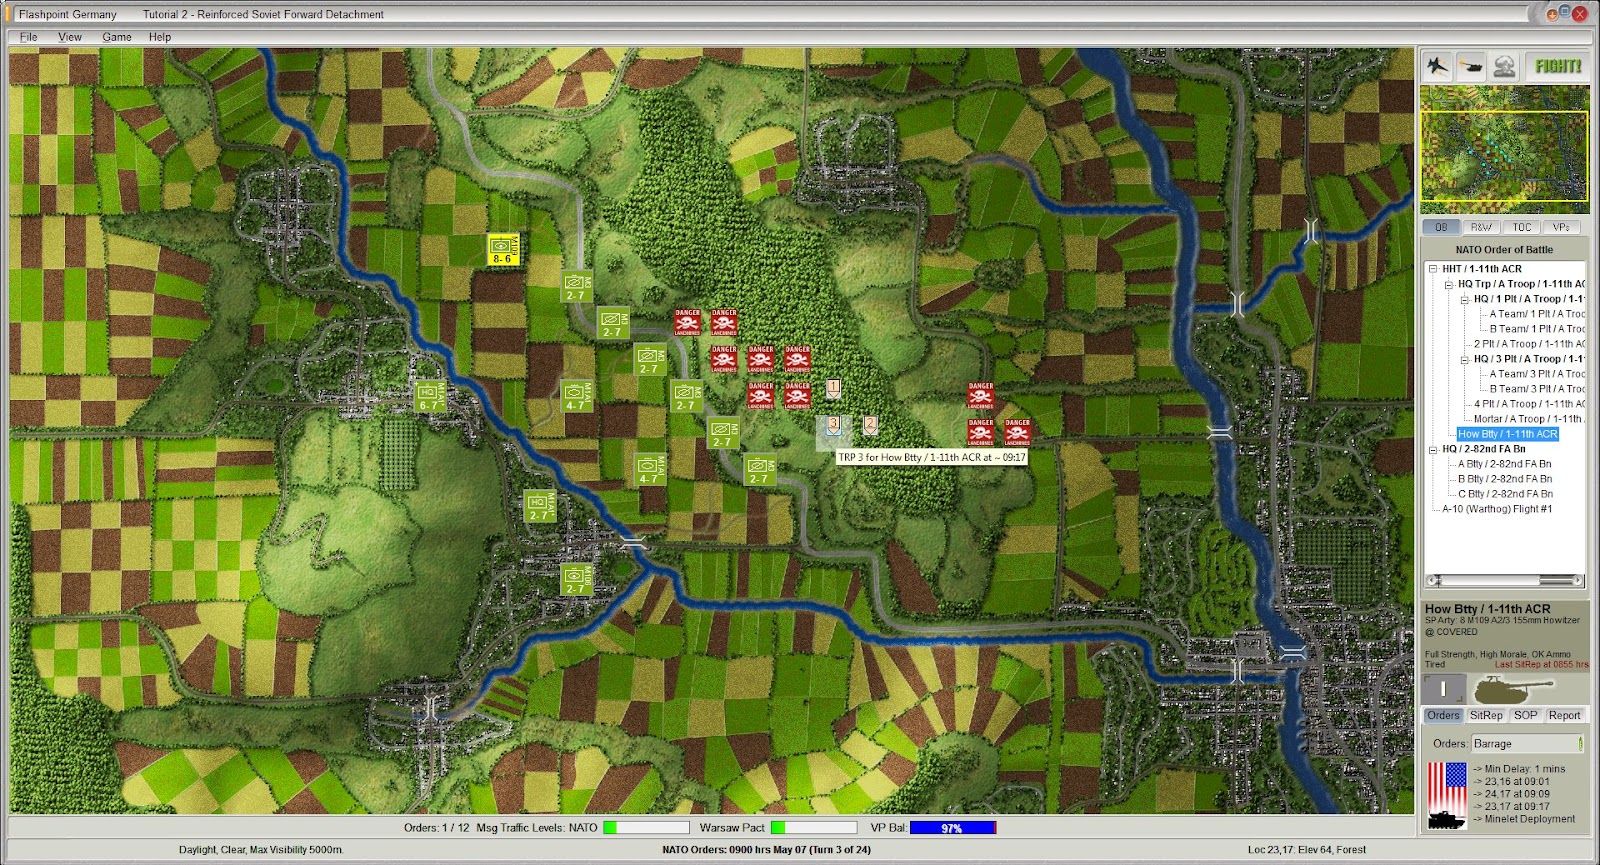
This is the pregame setup phase where I can take the default disposition of forces and drag and drop them where I like within the blue bounding box. The game map represents an area of the western portion of the Federal Republic of Germany measuring 20 km X 15 km with each square grid on the map represents 500 meters.
Pregame Setup Phase Two

I rearrange my force as follows: the two available minefields are moved to grids 21-16 and 20-15, 4th Platoon (4 Abrams MBT) is moved to 16-16, 2nd Platoon (4 Abrams MBT) is moved to 18-18, and the various Cavalry Teams (consisting of two M3 Bradley CFV’s each) is arrayed in a line running from 16-13 to 21-18 with the Recce units on either end.
The howitzer battery comprised of eight M-109’s (155mm) is moved to grid 14-12 which has a cover rating of 70, while the mortar troop consisting of two M-106’s (107 mm) is moved to 16-21 which has a cover rating of 80. Once combat begins and fire missions have commenced, these artillery units will be subjected to counterbattery fire and will scoot to adjacent girds based on their core doctrine.
I can also issue orders at this point that will be executed immediately at the start of the game (and avoiding the command lag time penalty and the staff order point costs associated with giving these orders). To this extent I order the on-map M-109 battery to fire a minelet barrage at grids 22-16, 21-15, and 20-14, and the off-map M-109 batteries to fire minelets at 28-17, 27-17, 27-16 (a roadway curve that is a likely avenue of approach), 19-14, 18-13, 17-12 (running in front of the forest tree line), and 22-15, 21-14, and 20-13 (directly inside the forest).
This layer of mines can cause some vehicle loss for the Soviets and reduce the amount of armor that my defensive deployment will face as it comes out of the forest, the most likely attack path that the enemy will take.
Combat Action

At the end of turn one most of the minelet barrages are
complete and the additional red icons are visible on the map. The activity has
drawn some counterbattery fire from the enemy and I have suffered the loss of
three M-109’s from the off map units (I like the fact that off map attrition is
modeled in this game).
At the end of turn two I order the on map M-109 to fire
another minelet barrage at the flagged location on the map. During the
resolution of this turn the Soviets lost four vehicles to the minefield
deployed on the roadway running behind the forest.

At the end of turn three the effect of the Soviet push out of the forest is seen. Although the NATO force was dug in and had superior range to engage the enemy, there was a high rate of attrition among both sides with the Red Army suffering the loss of 26 vehicles while the Americans lost 14 (including five of the eight Abrams MBT’s).
During the orders phase between turns I order an A-10 airstrike on grid 20-15 with a discretion radius of 2, and suppression artillery barrages on and in front of the currently sighted enemy positions.

At the end of turn four the A-10 airstrike was a smashing success, taking out four enemy vehicles. The Soviets fared poorly during the turn, losing an additional 16 vehicles to NATO losing only three. I order the only off map artillery with remaining minelets to deploy at the marker flags.
While several of my units have been forced moved due to doctrine, I am basically OK with where they are at the moment given the Victory Point meter at the bottom of the screen and the severe loss incurred by the enemy.

At the end of turn five there is no additional contact made with the enemy, and I order the now available A-10 airstrike to 19-15 with a two grid discretion radius (there has to be something there).
Neither side lost any vehicles or off map units during the turn.

At the end of turn six the WARSAW Pact forces have effectively knocked my NATO force back and have clearly threatened control of the objective sector. There was significant attrition during the turn with the Soviets losing and additional 24 vehicles to the Americans losing 10 (including the elimination of the remaining Abrams MBT’s).
The Red Army has been spotted attempting to cross the river at grid 18-20, so I order one of the artillery assets to perform a neutralizing fire mission on three adjacent grid references that are flagged.

At the end of turn seven the enemy has lost and additional
six vehicles to none for my side. An available A-10 airstrike is ordered
against the lone sighted contact.

Shortly after the beginning of turn eight I receive the
message that one force has exceeded 80% casualties among their line units and I
am given the option to declare the battle over which I accept.

Unfortunately due to my high attrition rate I only have
enough vehicles (steps as the game refers to them) in the objective sector to
warrant a Marginal NATO Victory outcome.
After-action Reports

The Staff Overview and Summary reveal the final score of 83-28. This correlates into 79 enemy vehicles destroyed for the loss of 28 on my side, in no small part due to my inability to amass enough minefield deployment early on to sufficiently bloody the Soviets before they emerged from the tree line in the forest. Everything has a risk though and sustained early barraging comes at a cost of detection and off map counterbattery fire to which I did suffer some loss early on.

The Tactical Operations Staff Diary details the breakdown of
the battle in spreadsheet format: 28 units lost for 66 kills. The A-10
airstrikes were effectively accounting of eight enemy vehicles (steps)
destroyed, while the two Abrams MBT platoons (2nd and 4th
Plt/A Troop/1-11th ACR) tallied 21 total kills before being eliminated.
Post Mortem
This is a fun scenario that is worth playing on normal to advanced difficulty settings with the tutorial training wheel settings taken off. I have won it in the past keeping six of eight MBT’s alive and have secured a Tactical NATO Victory as early as turn four; however no two scenarios play out exactly the same.
While it could have benefited with the inclusion of helicopters (which are featured in the game as a unit counter and not abstracted to the level of the A-10 airstrikes), it is a fun mission nonetheless and worth the gaming time invested.
Игра - дикое говнище
ReplyDelete